There is always a lot of discussion about Photo-etch folding tools, which are an important part of working with PE, but not the only area that needs special attention. Removing the part from the fret, shaping and securing these metal parts all require a little different method than working with styrene.
Some of the tools we use for styrene can be carried over when working with PE, others are more of specialty tools. Some, like the product reviewed here from The Small Shop, not only makes life with Photo-etch easier, but also provides the basis for a better finished product.
the tool
Removing parts from the photo-etch fret should be an easy process, although a few things can go wrong while attempting it. If the cutting surface isnt firm enough the delicate part can be deformed at the attachment point. On the other hand, a too hard surface can cause your blades to dull quickly and possibly slip, or skip. The color of the cutting surface should have a good contrast to whats being cut, as many of these parts are small and difficult to see. Finally, when the part is freed from the fret, it can go flying off to who knows where thats when I hope they gave me some extras!
Contents:
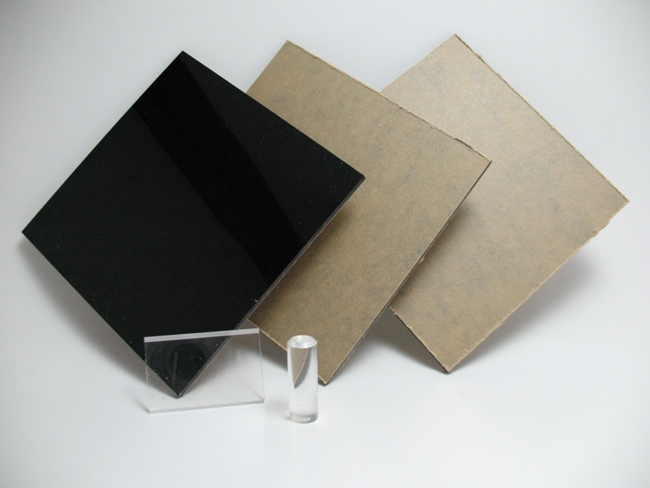
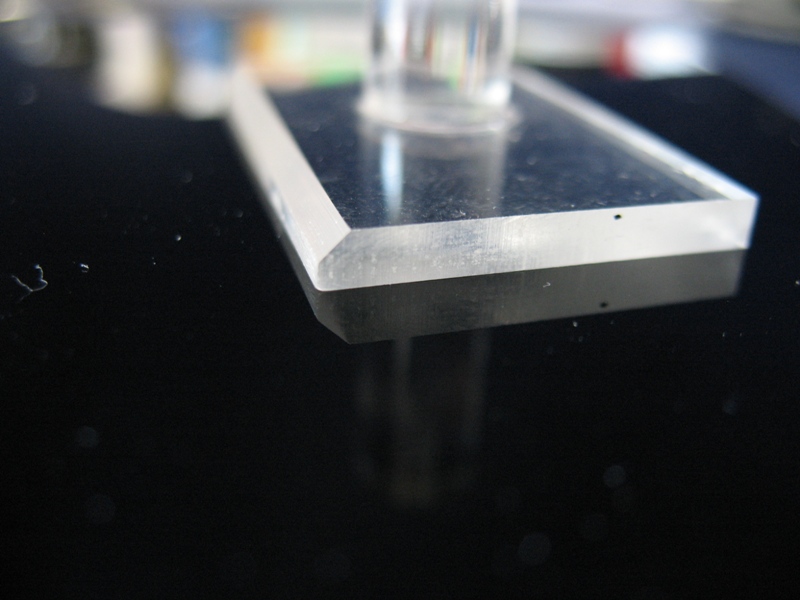
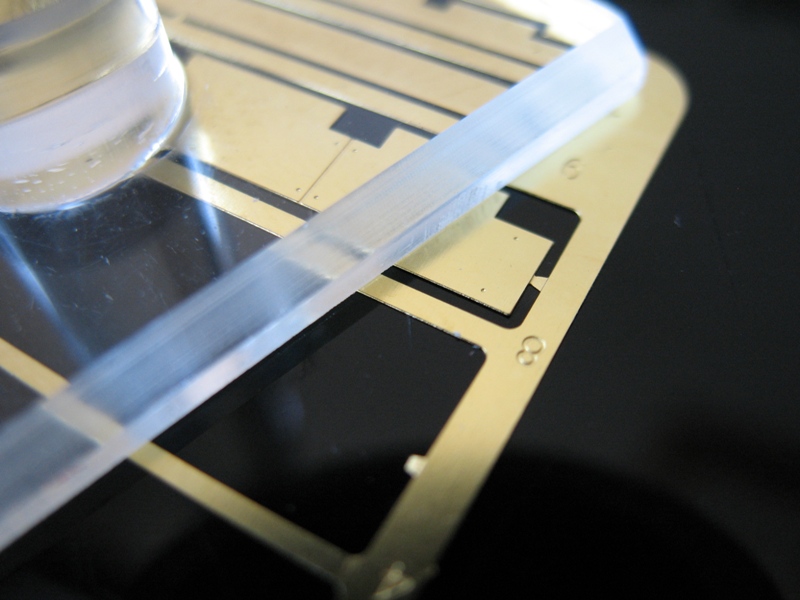
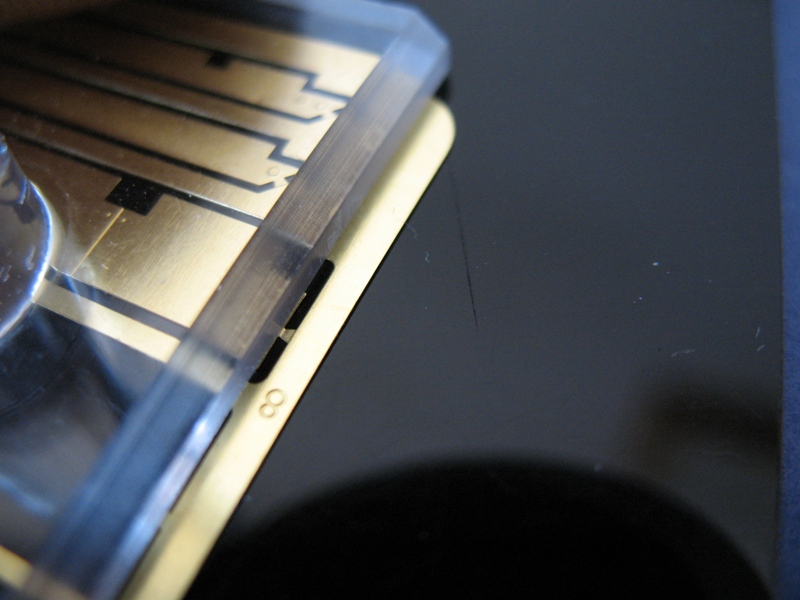
Packed in a sturdy plastic bag the kit includes three 4x4x1/8 black acrylic tiles with a mirror finish protected by backing paper, a 1.5x1x1/8 clear acrylic piece with one edge beveled, a small acrylic dowel, along with a single sided sheet of instructions. The only things needed to prepare this for use is to remove the protective paper from the tiles and glue the dowel to the smaller side (bevel up) of the clear acrylic press using cyanoacrylate or other suitable adhesive. At first, I wasnt going to glue the dowel on thinking it may be cumbersome, but found it not only easier to pick up the press, but also to find it on my messy workbench.
In Use:
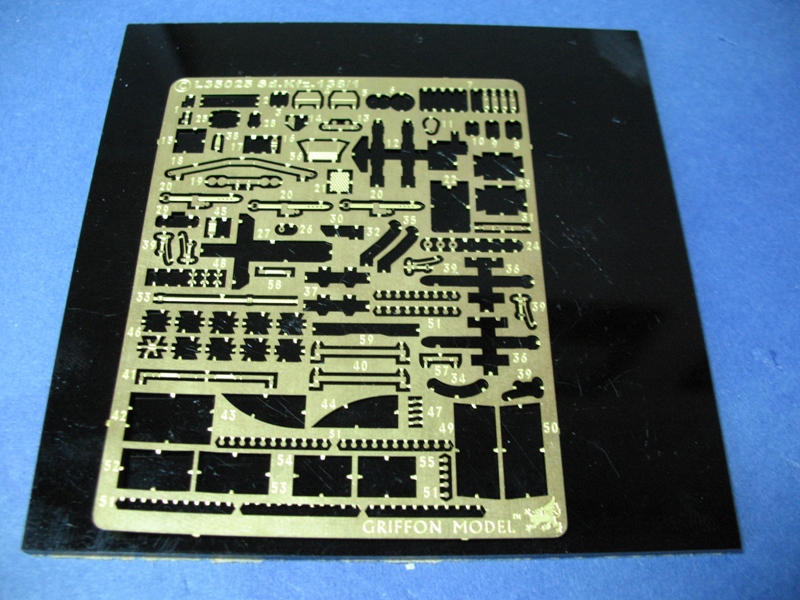
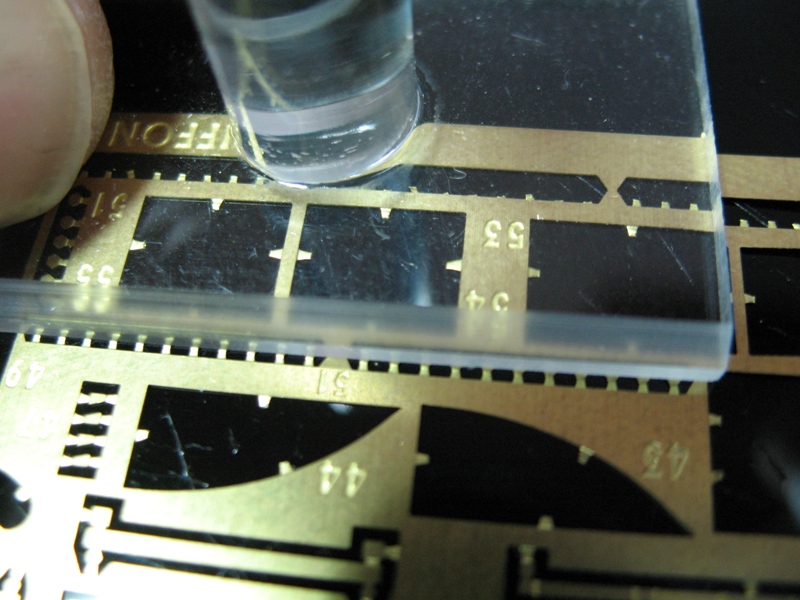
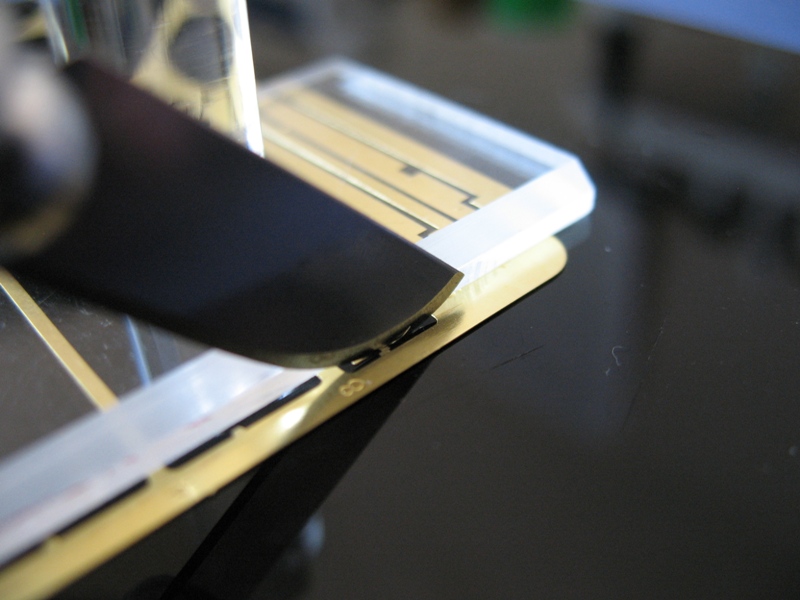
Using the PE Cut-Out Kit is a simple process, and following the instructions it is also an organization system using the three tiles. Place the PE fret on one of the tiles and position the press over the part with the beveled edge lined up to the cut-off point. Place your blade against the edge of the press and cut, using a #10 curved hobby blade with a gentle pressing, rocking motion provides the best results. A #11 or #17 blade can also be used with a pressing down cut, try not to drag the blade across as this can deform the part. Lift the fret off, leaving your cut part on the tile. If the part still has a 'nub' that needs trimming, it's very easy to see on the black background.
To use the organizing system, you then move the part to the second tile to be cleaned and shaped if needed, and the finished piece ends up on the final tile for safe keeping. Personally, I only use one tile as space is very limited on my bench, and put the other tiles away for later use. Also, leave the protective backing on the bottom of the tile to keep it from getting marred up until ready to use. Switch to a new tile surface when the one in use gets so marred that it's difficult to slide the fret around or you cannot find a clean area to cut.
conclusion
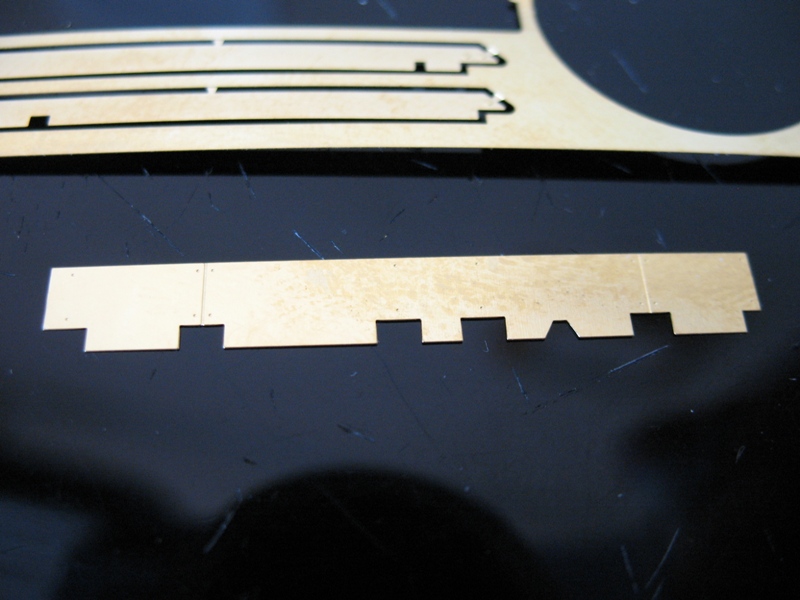
This is one of those items that once you use it you wonder how you got by without it. Ive tried a few different ways of detaching the PE parts from the frets and have found this simple tool to be easy and quick to use, and provides a very clean cut that will require little to no filing/sanding. With a total of six cutting surfaces to use, this should last a long time before replacement is needed.
SUMMARY
Highs: No more lost parts at the cutting stage, easy to use, helps achieve extremely clean cuts, small footprint on the workbench.Lows: None that I can find.Verdict: This cut-off kit does exactly what it should, it's easy to use, leaves parts with little to no clean-up and ends flying parts as they're detached from the fret. Highly recommend.
Our Thanks to The Small Shop! This item was provided by them for the purpose of having it reviewed on this KitMaker Network site. If you would like your kit, book, or product reviewed, please contact us.
About James Bella (c5flies) FROM: CALIFORNIA, UNITED STATES
My main interest is 1/35 scale WWII armor, Axis and Allied, and will occasionally branch out into other areas. The builds I have done so far have been pretty much OOB, and considering what most newer kits include, that is usually more than enough for me. Even though my projects do not always end up ...
Bill,
HD doesn't list it on their site, but Lowe's does......over $200.00 a sheet. I don't recall seeing smaller pieces (like they do with plywood....2' x 2' or 2' x 4').
InternetPlastics.com appears to allow you to purchase a piece sized 4" x 4" x 1/8" for about $2.90. Shipping probably wouldn't be nice though. You can also get a full sheet from them (4' x 8') for $260.00. Shipping on that would probably be a killer.
Mike
Smart move Bill, IMO! I'm all for making my own stuff to use, but in this case especially, the low cost of the kit coupled with my estimation of it's usable lifespan, just doesn't make it worthwhile to 'MacGyver' my own.
Jim, The Small Shop's website lists dealers, and I know Great Models carries these products also...although this kit is special order only at this time from GM. Most places use the same pricing as The Small Shop, with some even a bit higher...as far as shipping, The Small Shop ships extremely fast and keeps the cost at or near actual.
Another option is one of Armorama's advertiser's; JB Model. They'll be carrying the full line come next month (September). Their prices seem comparable. I buy most of my barrels from them now because of the price and service. May be an option.
Mike
I used this kit with my PE parts on my 2nd model build, Trumpeters 1:350 scale SS John W. Brown Liberty ship, and it was an immense help to me. After researching other benders, I found this is a inexpensive, simple but useful, way of safely cutting parts and bending shapes. It cannot make some intricate bends like the the $40/$50 benders, but my lack of skills probably added to this problem. Overall - it was worth the money!


Comments